One obstruction is enough
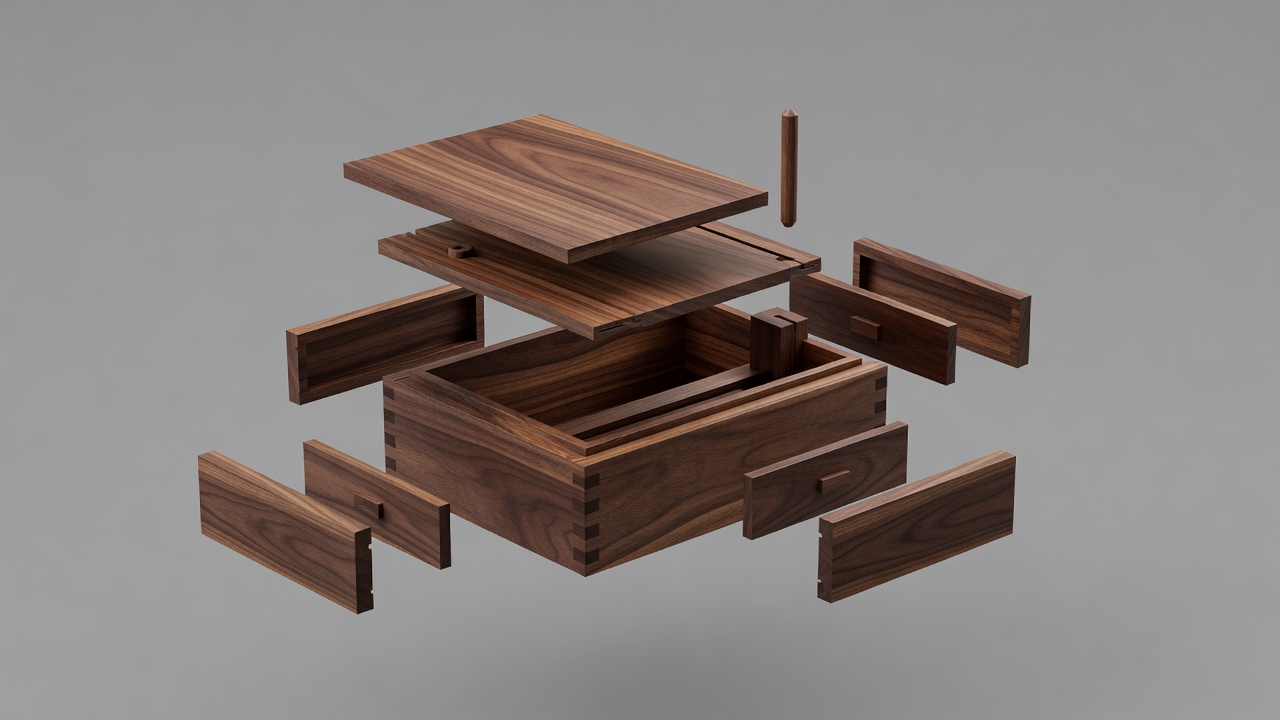
A secret box does not need a complicated combination. Here, a vertical wooden pin bridges the stationary rear bridge and a shallow pocket in the sliding lid. That bridge between parts prevents the lid from moving. Inverting the box lets the pin drop back into its chamber. Keep the box inverted while sliding the lid open.
The idea belongs to the broad family of orientation puzzles. Japanese himitsu-bako from Hakone are celebrated examples of secret-opening boxes, although their sliding-panel constructions are different from this simple gravity catch. This project is an approachable experiment, not a reproduction of traditional craft.
Start with trustworthy offcuts
Choose clean, dry plywood and solid-wood strips with no nails, splitting or unknown treatment. Avoid pallet timber of uncertain origin and painted scraps whose finish you cannot identify. A small base around 150 × 100 mm is enough. Scale the walls to your available material rather than forcing every offcut into a fixed cutting list.
You need a base, four walls, two inner support rails, a flat sliding lid and a bridge spanning the back of the opening. Add a smooth wooden dowel around 5 mm in diameter, glue, clamps, a drill, a suitable saw, abrasive paper and eye protection. Follow each tool manufacturer’s instructions. Clamp work before drilling or sawing, control dust and use respiratory protection appropriate to the work. Loose clothing and fingers must stay clear of moving tools.
Make a cardboard mock-up of the rails and bridge before cutting wood. It will show which edge the lid exits and whether the bridge leaves enough room for the pin chamber.
Build the ordinary box first
1. Establish the sliding path
Assemble the base and walls with an opening at the top of the front wall for the lid to exit. Glue a support rail along each inner side wall. The lid rests on those rails. Add retaining strips above the lid’s side edges so it can slide forward but cannot lift out. Leave a little clearance above and beside it.
Keep the rear bridge removable during fitting. Sand the lid edges until the lid slides freely when the box is upright and inverted. Check that the front exit slot is not narrower than the path between the rails. Do not add a catch until this movement is dependable.
2. Make a captured pin chamber
Drill a vertical bore through the rear bridge, centered over a solid area of the closed lid. A bore slightly wider than the dowel should let the pin fall freely without much sideways lean. For a 5 mm dowel, test a 5.5 mm bore in scrap first. Actual dowel sizes vary.
As an example, use a bridge 12 mm thick and a pin 9 mm long. Cap the bore’s upper end with a glued cover plate. With the lid removed, an additional thin lower plate with a smaller opening can retain a stepped pin; alternatively, keep the lid installed beneath the bore during normal use and fit a lid travel stop so the chamber never becomes exposed. The travel-stop approach is simpler for this prototype.
3. Give the pin somewhere to lock
With the lid fully closed, mark the bore position on its upper surface. Remove the lid and make a shallow pocket about 3 mm deep, taking care not to drill through. When reassembled upright, the pin rests in this pocket and extends into the bridge, preventing sliding.
When inverted, the pin drops toward the cap. The chamber must accommodate the entire pin so its lower end clears the lid. Test this with the bridge still removable. If the pin is too long, shorten it rather than deepening the lid pocket unnecessarily.
4. Capture and finish the mechanism
Install a stop under the lid that limits opening travel before the lid’s rear edge passes the pin chamber. The box should open enough to reveal its compartment while the pin remains supported and enclosed. Check the stop in both orientations, then secure the bridge. Keep glue out of the bore.
Make the secret repeatable
Close the lid while the box is inverted. Turn it upright and listen for the pin to settle. A gentle pull should confirm that the catch engaged. To solve, invert the box without pulling on the lid, wait for the pin to fall clear, then slide the lid while maintaining that orientation. Pulling first can trap the pin against the pocket wall.
If inversion does not release the lid
Remove pulling pressure and try again. If the pin still sticks, inspect the bore for glue, rough fibers or an over-tight fit. Repair with the bridge accessible; do not hit the box to force the mechanism.
If the box opens upright
Check pocket alignment and pin length. The pin must overlap both the bridge and the pocket when resting upright. Also check whether finish has prevented the pin from dropping.
Apply any finish only after testing and keep it away from sliding surfaces until fully cured. A small underside mark can hint that orientation matters. Offer that clue before a frustrated solver starts shaking the box.
Want concealed motion without woodworking? Build a washer maze controlled through its base.